
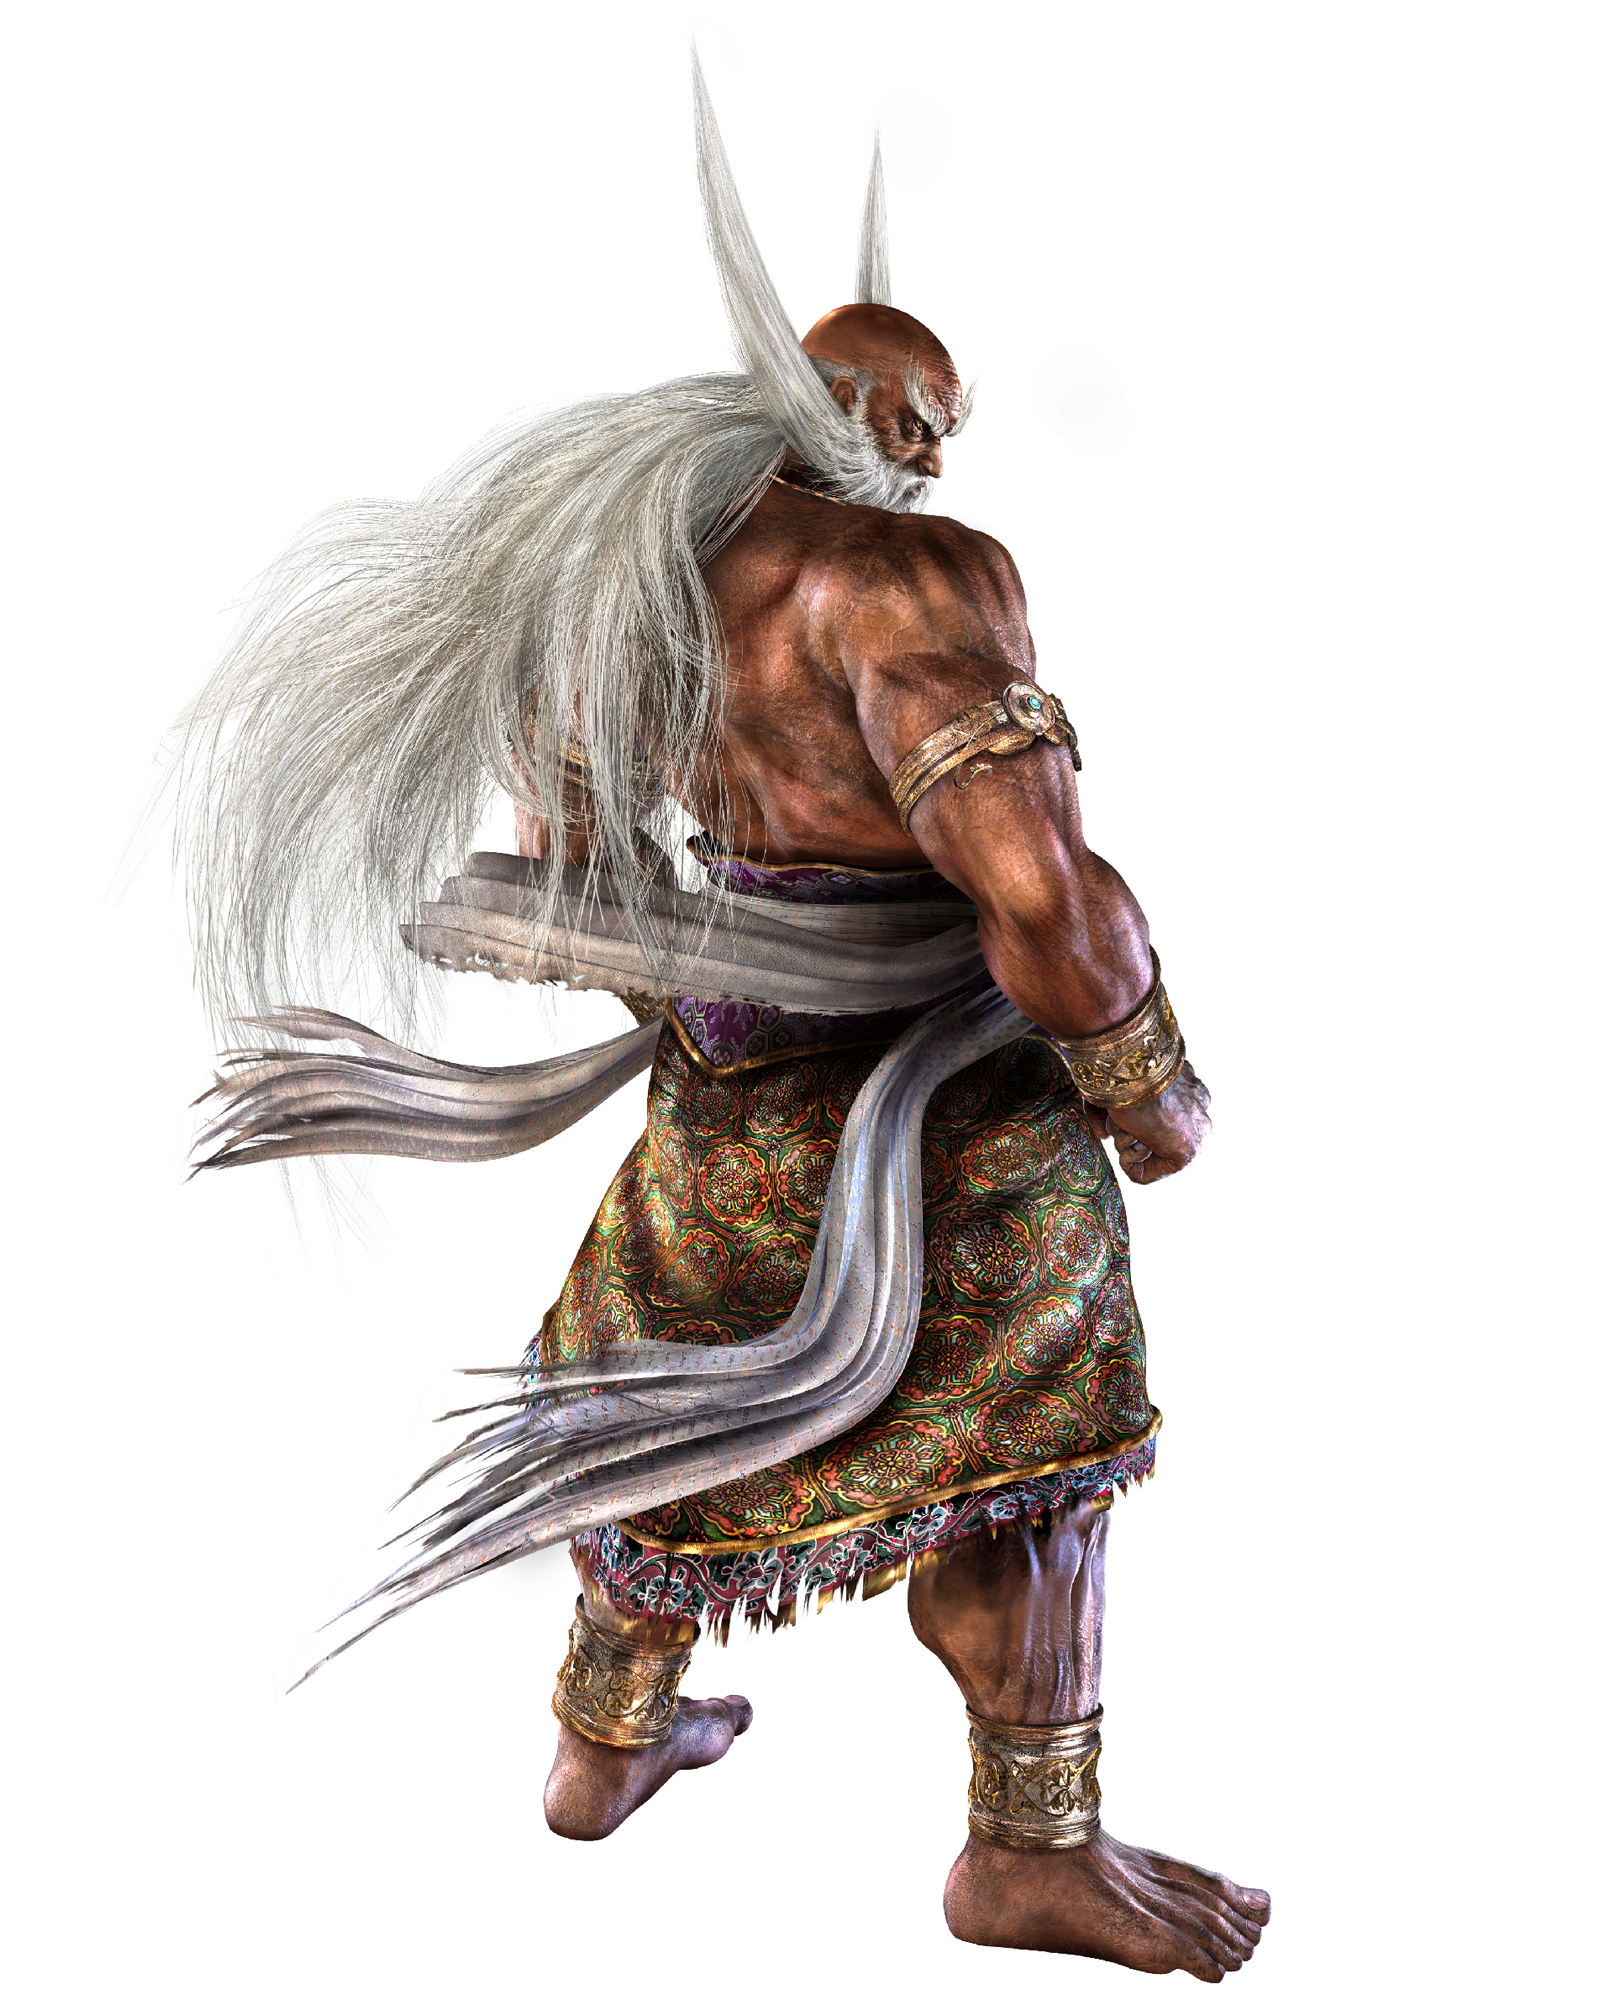
Tekken 5 / Dark Resurrection · Tekken 5 · Dark Resurrection archive
Jinpachi Mishima
Throws, moves and combos, in familiar notation.
Shared commands appear once. Differences show Tekken 5 above DR. Edition labels identify documented coverage; only “DR only” means exclusive.
Damage includes the full starter. Earlier hits in a launcher string may not be guaranteed; CH requires a counter hit. PS2 routes are not automatically confirmed for arcade 5.1 or DR.
Main Combos
- Juggle follow-upTekken 5
- Launcher (choose one)
 +

 +

 +
 ,
 +

 +

 +

Guide damage: 44–60 (varies by launcher)
- Juggle follow-up
- Launcher
- +
Tekken 5+,, +,+,+,+
Guide damage: 128
DR+++++
Guide damage: 77
- Juggle follow-upTekken 5
- Launcher
- +
+Guide damage: 36
- Juggle follow-upTekken 5
- Launcher (choose one)
- +
- ,+
FCGuide damage: 38
- Juggle follow-upTekken 5
- Launcher (choose one)
- +
- ,+
FC +,+
Guide damage: 56
- Juggle follow-upTekken 5
- Launcher
- +
 ,
Guide damage: 29
- Juggle follow-upTekken 5
- Launcher
- +
+ ,+,,+,+,+,+
Guide damage: 118
- Juggle follow-upTekken 5
- Launcher (choose one)
- ,+
- +
,+Guide damage: 46
- Juggle follow-upTekken 5
- Launcher
- ,+
,++,,+,+,+,+Guide damage: 158
- Juggle follow-upTekken 5
- Launcher (choose one)
- +
- +
+Guide damage: 51–60 (varies by launcher)
- Juggle follow-upTekken 5
- Launcher
- +
,++,,++Guide damage: 138
- Juggle follow-upTekken 5
- Launcher
- +
+Guide damage: 55
- Juggle follow-upTekken 5
- Launcher
- +
+,Guide damage: 90
- Juggle follow-upTekken 5
- Launcher
- +
++,,+,+,+,+Guide damage: 156
- Juggle follow-upTekken 5
- Launcher (choose one)
- ,+
- +
++++,+,+,+,+Guide damage: 112–116 (varies by launcher)
- Juggle follow-upTekken 5
- Launcher
- ,+
+FCGuide damage: 37
- Juggle follow-upTekken 5
- Launcher
- ,+
+FC+Guide damage: 38
- Juggle follow-upTekken 5
- Launcher (choose one)
- +,
- ,
- +
+Guide damage: 48
- Juggle follow-upTekken 5
- Launcher (choose one)
- +,
- ,
- +
++,,+,+,+,+Guide damage: 172
- Juggle follow-upTekken 5
- Launcher
- ,

Guide damage: 72
- Juggle follow-upTekken 5
- Launcher
- ,
+,,+,+,+,+,+Guide damage: 150
- Juggle follow-upTekken 5
- Launcher+,
Guide damage: 70
- Juggle follow-upTekken 5
- Launcher+,+,,++
Guide damage: 114
- Juggle follow-upTekken 5
- Launcher+

Guide damage: 52
- Juggle follow-upTekken 5
- Launcher (choose one)+,,+,+,+,+,+
Guide damage: 136–142 (varies by launcher)
- Juggle follow-up
- LauncherTekken 5,
Guide damage: 50
DR+,,Guide damage: 64
- Juggle follow-upTekken 5
- Launcher+,,+,+,+,+,+
Guide damage: 140
- Juggle follow-upDR
- Launcher (choose one)
- +
- +
+Guide damage: 31–32 (varies by launcher)
- Juggle follow-upDR
- Launcher
- +
FC+Guide damage: 32
- Juggle follow-upDR
- Launcher (choose one)
- +
- +
- +
FC+FC++Guide damage: 52–61 (varies by launcher)
- Juggle follow-upDR
- Launcher
- +
CC+Guide damage: 42
- Juggle follow-upDR
- Launcher (choose one)
- +
- ,
+Guide damage: 46–62 (varies by launcher)
- Juggle follow-upDR
- Launcher (choose one)
- +
- ,
+++,,Guide damage: 68–84 (varies by launcher)
- Juggle follow-upDR
- Launcher
- +
+Guide damage: 50
- Juggle follow-upDR
- Launcher (choose one)
- ,+
- +
 +
+++Guide damage: 42–46 (varies by launcher)
- Juggle follow-upDR
- Launcher (choose one)
- ,+
- +
- +
,+,,Guide damage: 61–65 (varies by launcher)
- Juggle follow-upDR
- Launcher
- +
FCGuide damage: 28
- Juggle follow-upDR
- Launcher
- +
,+,, - Juggle follow-upDR
- Launcher (choose one)
- +
 ,+,,+,,
f+2,1,1+2 knockdown can be teched midscreen (f, b, or 1/2/3/4), can get follow-ups if the opponent doesn't tech. Follow-up damage: 43.
- Juggle follow-upDR
- Launcher
- +
+,,f+2,1,1+2 knockdown can be teched midscreen (f, b, or 1/2/3/4), can get follow-ups if the opponent doesn't tech. Follow-up damage: 37.
- Juggle follow-upDR
- Launcher (choose one)
- +
+,,,(air throw)+Follow-up damage: 37.
- Juggle follow-upDR
- Launcher
- +(opponent crouching)
+,,+,,+,,f+2,1,1+2 knockdown can be teched midscreen (f, b, or 1/2/3/4), can get follow-ups if the opponent doesn't tech. Use f+1 combos on most characters. Use df+2 for larger characters (see notes on below df+2 combos). Use shorter b+1 combos on smaller characters that both f+1 and df+2 will whiff on. Easy combos are at the bottom for quick damage. Ability to connect f+4 (crouch) into df+2 for a full combo depends on the size of the opponent's character, as well as the Jinpachi costume the player is using. "Human" Jinpachi (selected with 2) can connect df+2 in this combo on Armor King, Dragunov, Feng, Jack-5, Jinpachi, King, Kuma and Marduk. However, the boss versions of Jinpachi, being "Demon" and "Fire" Jinpachi (from 5.0 and DR, selected with 3/4 and 1 respectively), can only connect df+2 to combo on Jack-5, Jinpachi, Kuma and Marduk (the largest characters). i.e. "Human" Jinpachi can get extra combos on Armor King, Dragunov, Feng and King, where the boss costumes can't. Follow-up damage: 64.
- Juggle follow-upDR
- Launcher
- +(opponent crouching)
+,+,,f+2,1,1+2 knockdown can be teched midscreen (f, b, or 1/2/3/4), can get follow-ups if the opponent doesn't tech. Use f+1 combos on most characters. Use df+2 for larger characters (see notes on below df+2 combos). Use shorter b+1 combos on smaller characters that both f+1 and df+2 will whiff on. Easy combos are at the bottom for quick damage. Ability to connect f+4 (crouch) into df+2 for a full combo depends on the size of the opponent's character, as well as the Jinpachi costume the player is using. "Human" Jinpachi (selected with 2) can connect df+2 in this combo on Armor King, Dragunov, Feng, Jack-5, Jinpachi, King, Kuma and Marduk. However, the boss versions of Jinpachi, being "Demon" and "Fire" Jinpachi (from 5.0 and DR, selected with 3/4 and 1 respectively), can only connect df+2 to combo on Jack-5, Jinpachi, Kuma and Marduk (the largest characters). i.e. "Human" Jinpachi can get extra combos on Armor King, Dragunov, Feng and King, where the boss costumes can't. Follow-up damage: 58.
- Juggle follow-upDR
- Launcher
- +(opponent crouching)
+,+,,,(air throw)+Use f+1 combos on most characters. Use df+2 for larger characters (see notes on below df+2 combos). Use shorter b+1 combos on smaller characters that both f+1 and df+2 will whiff on. Easy combos are at the bottom for quick damage. Ability to connect f+4 (crouch) into df+2 for a full combo depends on the size of the opponent's character, as well as the Jinpachi costume the player is using. "Human" Jinpachi (selected with 2) can connect df+2 in this combo on Armor King, Dragunov, Feng, Jack-5, Jinpachi, King, Kuma and Marduk. However, the boss versions of Jinpachi, being "Demon" and "Fire" Jinpachi (from 5.0 and DR, selected with 3/4 and 1 respectively), can only connect df+2 to combo on Jack-5, Jinpachi, Kuma and Marduk (the largest characters). i.e. "Human" Jinpachi can get extra combos on Armor King, Dragunov, Feng and King, where the boss costumes can't. Follow-up damage: 58.
- Juggle follow-upDR
- Launcher (choose one)
- +
- (Charged stance)
,,,+,,Inconsistent. Must hold f for a very brief amount of time for both hits of 1,1 to connect, while also not sending the opponent too far away for f+2,1,1+2 to whiff. f+2,1,1+2 knockdown can be teched midscreen (f, b, or 1/2/3/4), can get follow-ups if the opponent doesn't tech. Follow-up damage: 46.
- Juggle follow-upDR
- Launcher
- (Charged stance)
+,+,+,,Does not work on larger characters, such as Jinpachi, Jack-5 and Marduk (first df+1 doesn't juggle them high enough). f+2,1,1+2 knockdown can be teched midscreen (f, b, or 1/2/3/4), can get follow-ups if the opponent doesn't tech. Follow-up damage: 42.
- (Charged stance)
- Juggle follow-upDR
- Launcher (choose one)
- +
- (Charged stance)
- ,+
- +
+,,+Follow-up damage: 41.
- Juggle follow-upDR
- Launcher (choose one)
- +
- +
,+(ground bounce),,+,+Must crouch cancel out of d+3 with u. b+2 ground bounces for juggle if executed with correct timing (quickly for d+3, slight delay with df+3), otherwise will catch techs for lower damage. d+1 spike can be inconsistent. b+2 damage at end of combo depends if/how opponent techs. Follow-up damage: 61/67.
- Juggle follow-upDR
- Launcher (choose one)
- +
- +
,+(ground bounce),,(grounded opponent)+Must crouch cancel out of d+3 with u. b+2 ground bounces for juggle if executed fast enough, otherwise will catch techs for lower damage. Follow-up damage: 51.
- Juggle follow-upDR
- Launcher (choose one)
- +
- +
- +
FC+,Follow-up damage: 26.
- Juggle follow-upDR
- Launcher
- +(opponent FUFT/FDFA)
,,+Opponent is ground bounced off the ground for a juggle. If opponent is FUFT or FDFA, they will be launched in FUFT. Follow-up damage: 44.
- Juggle follow-upDR
- Launcher
- +(opponent FUFT/FDFA)
,+,+b+2 ground bounces for juggle if opponent doesn't tech, otherwise will catch techs for lower damage. This sequence can be looped with another b+2 at the end of this and other combos that end with b+2. b+2 damage at end of combo depends if/how opponent techs. Opponent is ground bounced off the ground for a juggle. If opponent is FUFT or FDFA, they will be launched in FUFT. Follow-up damage: 43/49.
- Juggle follow-upDR
- Launcher
- +(opponent FUFT/FDFA)
,+,,f+2,1,1+2 knockdown can be teched midscreen (f, b, or 1/2/3/4), can get follow-ups if the opponent doesn't tech. Opponent is ground bounced off the ground for a juggle. If opponent is FUFT or FDFA, they will be launched in FUFT. Follow-up damage: 38.
- Juggle follow-upDR
- Launcher
- +(opponent FUFA/FDFT)
,,+,,Must be crouch canceled with u. f+2,1,1+2 knockdown can be teched midscreen (f, b, or 1/2/3/4), can get follow-ups if the opponent doesn't tech. Opponent is ground bounced off the ground for a juggle. If opponent is FUFA or FDFT, they will be launched in FUFA. Follow-up damage: 40.
- Juggle follow-upDR
- Launcher
- +(opponent FUFA/FDFT)
,,,+Opponent is ground bounced off the ground for a juggle. If opponent is FUFA or FDFT, they will be launched in FUFA. Follow-up damage: 33.
- Juggle follow-upDR
- Launcher
- +(opponent FUFA/FDFT)
,+Opponent is ground bounced off the ground for a juggle. If opponent is FUFA or FDFT, they will be launched in FUFA. Follow-up damage: 30.
- Juggle follow-upDR
- Launcher
- ,+
+,FC+Follow-up damage: 13.
- Juggle follow-upDR
- Launcher (choose one)
- ,+
- +
,+,,f+2,1,1+2 knockdown can be teched midscreen (f, b, or 1/2/3/4), can get follow-ups if the opponent doesn't tech. Follow-up damage: 41.
- Juggle follow-upDR
- Launcher (choose one)
- ,+
- +
+,,+More consistent than 2, d+1+2. Follow-up damage: 40.
- Juggle follow-upDR
- Launcher+,,,+
Follow-up damage: 38.
- Juggle follow-upDR
- Launcher,+,+,+
b+2 ground bounces for juggle if opponent doesn't tech, otherwise will catch techs for lower damage. This sequence can be looped with another b+2 at the end of this and other combos that end with b+2. b+2 damage at end of combo depends if/how opponent techs. Follow-up damage: 34/40.
- Juggle follow-upDR
- Launcher+,,
Follow-up damage: 37.
- Juggle follow-upDR
- Launcher
- +
+(ground bounce),,,+Follow-up damage: 62.
- Juggle follow-upDR
- Launcher
- +
+(ground bounce),,+,+b+2 ground bounces for juggle if executed fast enough, otherwise will catch techs for lower damage. d+1 spike can be inconsistent. b+2 damage at end of combo depends if/how opponent techs. Follow-up damage: 61/67.
- Juggle follow-upDR
- Launcher
- +
+(ground bounce),,(grounded opponent)+b+2 ground bounces for juggle if executed fast enough, otherwise will catch techs for lower damage. Follow-up damage: 51.
- Juggle follow-upDR
- Launcher
- +
,+,,,+Follow-up damage: 37.
- Juggle follow-upDR
- Launcher
- +
,+,,+,+b+2 ground bounces for juggle if opponent doesn't tech, otherwise will catch techs for lower damage. This sequence can be looped with another b+2 at the end of this and other combos that end with b+2. b+2 damage at end of combo depends if/how opponent techs. Follow-up damage: 37/43.
- Juggle follow-upDR
- Launcher
- +(parry success)
Highest damage option, but no oki or wall carry. Follow-up damage: 60.
- Juggle follow-upDR
- Launcher
- +(parry success)
,,+,,f+2,1,1+2 knockdown can be teched midscreen (f, b, or 1/2/3/4), can get follow-ups if the opponent doesn't tech. Follow-up damage: 41.
- Juggle follow-upDR
- Launcher
- +(parry success)
,,+,,,+Follow-up damage: 40.
- Juggle follow-upDR
- Launcher
- (wall combo)
+Combo off of unblockable move near the wall. Must be point blank to the wall, otherwise the opponent won't be wall splat. Follow-up damage: 25.
- Juggle follow-upDR
- Launcher
- (wall combo)
+Combo off of unblockable move near the wall. Must be point blank to the wall, otherwise the opponent won't be wall splat. Follow-up damage: 22.
Standing Punishers
- i10Startup
- DR,DR,
Wallsplat combo near wall.
DR, - i13Startup
- DR+
- i14Startup
- DR+
Wallsplat combo near wall.
DRLauncher+DRLauncher+DR+,Wallsplat combo near wall.
- i18Startup
- DR+
Best used on moves with large pushback.
DR+Best used on moves with large pushback. Wallsplat combo near wall.
- i23Startup
- DRLauncher+ command entry,+
While Rising / Crouching Punishers
- i10Startup
- FCDR
- i11Startup
- FCDR
- i13Startup
- DR
- i14Startup
- DR
Wallsplat combo near wall.
- i18Startup
- DRLauncher
- i23Startup
- DRLauncher+ command entry,+
Check range and recovery position. Motion launchers need additional command-entry time.
Wall Combos
- Wall follow-upDR
- +,+
Regular combo (scaled) Damage changes depending on if/how opponent tech rolls. Use 1 for high wall splat hit, then continue with normal combo. Follow-up damage: 39/48.
- Wall follow-upDR
- +,
Regular combo (scaled) Does not combo at normal wall splat height, use as high wall splat combo. Follow-up damage: 38.
- Wall follow-upDR
- +,+
Regular combo (scaled) Damage changes depending on if/how opponent tech rolls. Use 1,1 , 2 or df+1 for high wall splat hit, then continue with normal combo. Follow-up damage: 35/44.
- Wall follow-upDR
- +,(grounded opponent)+
Regular combo (scaled) Damage changes depending on if/how opponent tech rolls. Use 1 for high wall splat hit, then continue with normal combo. Follow-up damage: 34/42.
- Wall follow-upDR
- +
Low wall hit (near ground, after wall carry etc.) Follow-up damage: 21.
- Wall follow-upDR
- +
Low wall hit (near ground, after wall carry etc.) Follow-up damage: 21.
- Wall follow-upDR
- +
Low wall hit (near ground, after wall carry etc.) Follow-up damage: 17.
- Wall follow-upDR
- (grounded opponent)+
Low wall hit (near ground, after wall carry etc.) Follow-up damage: 16.
Throws
- Neck BreakerDR
- Or
 +
Damage: 35 · Throw
- Startup
- 12f
- On hit
- KND
Throw break:
Throw break 1. Side switch on hit
- Twisted MandalaDR
 Or+
Damage: 35 · Throw
- Startup
- 12f
- On hit
- KND / (FDFA)
Throw break:
Throw break 2
- Condemned EffigyDR
- ,+
Damage: 40 · Throw
- Startup
- 12f
- On hit
- KND / (FDFT)
Throw break:
Throw break 1+2. Can block the 1st hit of the throw animation by pressing b with correct timing (avoids all throw damage)
- Foot LaunchDR
- (crouch throw)+Or(crouch throw)+
- Raging TempestDR
- (air throw)Or(air throw)
Damage: 21 · Throw
- Startup
- 12f
- On hit
- KND
Unbreakable
- Dragon ScrewDR
- (left throw)Or(left throw)
Throw break:
- Fall AwayDR
- (right throw)Or(right throw)
Throw break:
- Branded InfidelDR
- (back throw)Or(back throw)
Unbreakable
- Foot LaunchDR
- +
Damage: 40 · Throw
- Startup
- 13f
- On hit
- KND / (FUFA)
Throw break 1 or 2. Side switch on hit
Recovery Setups
- Guaranteed follow-upDR
- Launcher
- +
+b+1+2 knockdown can be teched midscreen (f, b), can get follow-ups if the opponent doesn't tech. Use d+3 for a follow-up if the opponent doesn't tech. Follow-up damage: 17/25.
- Guaranteed follow-upDR
- Launcher (choose one)
- +
- +
(grounded opponent)+Damage changes depending on if/how opponent tech rolls. Follow-up damage: 16/24.
- Guaranteed follow-upDR
- Launcher
- +
+Damage changes depending on if/how opponent tech rolls. Follow-up damage: 17/25.
- Guaranteed follow-upDR
- Launcher
- +
+Damage changes depending on if/how opponent tech rolls. Follow-up damage: 16/24.
- Guaranteed follow-upDR
- Launcher
- +
+Damage changes depending on if/how opponent tech rolls. Follow-up damage: 21/30.
- Guaranteed follow-upDR
- Launcher
- +
,+b+1+2 knockdown can be teched midscreen (f, b), can get follow-ups if the opponent doesn't tech. Use d+3 for a follow-up if the opponent doesn't tech. Follow-up damage: 17/25.
- Guaranteed follow-upDR
- Launcher
- +
(grounded opponent)+Damage changes depending on if/how opponent tech rolls. Follow-up damage: 12/18.
- Guaranteed follow-upDR
- Launcher
- ,+
,+Damage changes depending on if/how opponent tech rolls. Follow-up damage: 21/30.
- Guaranteed follow-upDR
- Launcher
- ,+
,+b+1+2 knockdown mid-combo can be teched with f, b, or 1/2/3/4. If the opponent doesn't tech, b+1+2 will not set up for a follow-up, whereas they'll be put into a techable knockdown if they quick roll on the ground. Follow-up damage: 17/25.
Unblockable Attacks
- Demon InfernoDR
- ~~~~
Damage: 60... · Unblockable mid / Unblockable mid / Unblockable mid / Unblockable mid / Unblockable mid / Unblockable mid / Unblockable mid / Unblockable mid / Unblockable mid / Unblockable mid
- Startup
- 100~f
- On block
- !
- On hit
- KND
Shoots 9 close range fireballs, with the final one being similar to normal 1+2. Number of fireballs isn't controllable, always shoots 10
- Dark PurificationDR
- +Or+~Or+~
Damage: 25 · Unblockable mid
- Startup
- 65~66f
- On block
- +40g
- On hit
- +40g
- Sanjiva NagaDR
- (Face up feet towards)
Damage: 40 · Unblockable low
- Startup
- 50~90f
- On block
- !
- On hit
- KND
- Sanjiva NagaDR
- (Face up feet away)
Move List
- Demon FuryDR
Damage: 60 · Unblockable mid
- Startup
- 50~90f
- On block
- !
- On hit
- KND
- FireballVersion unverified
- +
- Spinning DemonVersion unverified
- ,,,+
- Hell SweepVersion unverified
- ,,,+
- Twin JabsDR
- ,
Damage: 10,12 · High / High
Follow-up only
- Startup
- 15f
- On block
- +1
- On hit
- +9
Combos from 1st hit
- Shining FistsDR
- ,
Damage: 10,20 · High / Mid
Follow-up only
- Startup
- 13f
- On block
- -17
- On hit
- KND
Combos from 1st hit
- Heaven RiftDR
- +,
Damage: 21,30 · High / Mid
Follow-up only
- Startup
- 20~22f
- On block
- -18
- On hit
- KND
- Tengu HammerDR
- ,+
Damage: 30 · Mid
- Startup
- 22~23f
- On block
- -13
- On hit
- KND
- Nebula StrikeDR
- ,+
Damage: 30 · High
- Startup
- 28~31f
- On block
- -12
- On hit
- KND
Knockdown can be teched with f or b
- False IdolDR
- +
Damage: 21 · Mid
- Startup
- 14~15f
- On block
- -8
- On hit
- -8c
- Counter hit
- +3c
- Orochi BiteDR
- +
Damage: 20 · High
- Startup
- 16~17f
- On block
- -10
- On hit
- KND / (FUFA)
- Demon SnareDR
- FC+
Damage: 16 · Low
- Startup
- 19~21f
- On block
- -8c
- On hit
- +2c
- Quick UpperDR
Damage: 8 · Mid
- Startup
- 13~14f
- On block
- -2~-3
- On hit
- +6~+7
- PurificationDR
- +
Damage: 30 · Mid
- Startup
- 30~33f
- On block
- ±0
- On hit
- KND / (FDFT)
- ElkeidDR
- +
Damage: 30 · High
- Startup
- 22~23f
- On block
- +27g
- On hit
- KND
- Fallen KingdomDR
- +
Damage: 35 · Mid
- Startup
- 18~19f
- On block
- -17
- On hit
- KND
- Skull CrackDR
- +
Damage: 25 · Mid
- Startup
- 14~15f
- On block
- -22
- On hit
- KND
Knockdown can be teched with f or b
- Demon Backhand SpinDR
- ,
Damage: 12,20 · High / High
Follow-up only
- Startup
- 17f
- On block
- -13
- On hit
- -2
Combos from 1st hit
- Susano WrathDR
- +,,
Damage: 22,21,25 · Mid / Mid / Mid
Follow-up only
- Startup
- 31~32f
- On block
- -17
- On hit
- KND
Knockdown can be teched with f or b
- Scorching ImpaleDR
- ,+
Damage: 25(,15) · Mid
- Startup
- 17~19f
- On block
- -13
- On hit
- Throw
Transitions to throw on front hit
- Wind GodfistDR
- +
Damage: 26 · High
- Startup
- 14f
- On block
- -10
- On hit
- +37a / (+27)
Launches on hit.
- Ground PounceDR
- +
Damage: 13 · Special mid
- Startup
- 11f
- On block
- -4
- On hit
- +7
- Violent UndertowDR
- +
Damage: 20 · Low
- Startup
- 20~21f
- On block
- -25
- On hit
- KND / (FUFA)
- Dark ResurrectionDR
- +
Damage: 18 · Mid
- Startup
- 17~18f
- On block
- -6c
- On hit
- +7c
- Counter hit
- KND / (FUFA)
Launches on counter hit.
- Serpent LashDR
Damage: 30 · Mid
- Startup
- 14~15f
- On block
- -16
- On hit
- KND
- Tamon KickDR
- +
Damage: 30 · Low
- Startup
- 20~21f
- On block
- -19
- On hit
- KND
- Oni ClawDR
- +
Damage: 24 · Low
- Startup
- 24~25f
- On block
- -25
- On hit
- KND
- Cursed LandDR
- +
Damage: 25 · Mid
- Startup
- 24~27f
- On block
- +7c
- On hit
- KND / (FDFA)
- Vajra KickDR
- +
Damage: 25 · Mid
- Startup
- 28~29f
- On block
- -6
- On hit
- KND
- Leaping Slash KickDR
- ,,+Or
 +
Damage: 30 · Mid
- Startup
- 22~23f
- On block
- +17
- On hit
- KND
- Kendatsu KickDR
Damage: 30 · Mid
- Startup
- 13~14f
- On block
- -7
- On hit
- +7
- Astral ProjectionDR
- +Or+
Special
Transitions to AP stance. Alternate input with b+3+4 to move backwards
- Axe KickDR
- +
Damage: 27 · Mid
- Startup
- 21~24f
- On block
- +4c
- On hit
- +8c / (+20)
- Counter hit
- KND / (FDFA)
- Ryumyaku ThrustDR
- ,+
Damage: 35 · High
- Startup
- 20~21f
- On block
- -21
- On hit
- KND
- Rakan KickDR
- +
Damage: 15 · Mid
- Startup
- 18~19f
- On block
- -6
- On hit
- +5
- Geta StompDR
- +
Damage: 7 · Low
- Startup
- 12f
- On block
- -13
- On hit
- -2
- Koumoku KickDR
- +
Damage: 21 · Low
- Startup
- 18~19f
- On block
- -18
- On hit
- +17g
- Zoushou KickDR
- +
Damage: 30 · High
- Startup
- 20f
- On block
- -8
- On hit
- KND / (FUFA)
- Demon Rakan KickDR
- +
Damage: 30 · Mid
- Startup
- 28~29f
- On block
- -15
- On hit
- KND
Knockdown can be teched with f or b
- Jikoku KickDR
Damage: 24 · Mid
- Startup
- 18~19f
- On block
- -14
- On hit
- +27a / (+17)
Launches on hit.
- TauntDR

Special
- KiDR
Special
Allows to access certain moves. Counter-hit state for 5 seconds. Cannnot block for 5 seconds
- Electric Thunder GodfistDR
- ,
Damage: ,
- Electric Wind GodfistDR
- ,
Damage: ,
Launches on hit.
- Attack ReversalDR
- +Or+
Damage: 8 · Special
CH reversal tool. Only triggers on interrupting an opponent's move startup, no hitbox otherwise
- Wall JumpDR
- ,,

Mid
- Basic UppercutDR only
- +
Damage: 8 · Mid
- Startup
- 13~15f
- On block
- -2
- On hit
- +8
- Power Jump Kick LauncherDR only
- ,+Or,+
- Right Jump KickDR only
- +Or+
- Right Vertical Jump Kick LauncherDR only
- +
- RoundhouseDR only
Damage: 30 · High
- Startup
- 16f
- On block
- -5
- On hit
- KND
- Side KickDR only
Damage: 35 · High
- Startup
- 20~21f
- On block
- -14
- On hit
- KND
- Weighted PunchDR only
- +Or+Or+
- JabDR
Damage: 10 · High
- Startup
- 10f
- On block
- +1
- On hit
- +9
- 2DR
Damage: 12 · High
- Startup
- 10f
- On block
- ±0
- On hit
- +9
- f+1DR
- +
Damage: 21 · High
- Startup
- 14~16f
- On block
- -16
- On hit
- +45a
- f+2DR
- +
Damage: 22 · Mid
- Startup
- 16~17f
- On block
- -10
- On hit
- -9
- f+2,1DR
- +,
Damage: 22,21 · Mid / Mid
Follow-up only
- Startup
- 29~31f
- On block
- -12
- On hit
- -1
- d/b+3DR
- +
Damage: 17 · Low
- Startup
- 15~17f
- On block
- -18
- On hit
- -4
- FC 1DR
- FC
Damage: 8 · Special mid
- Startup
- 10f
- On block
- -5
- On hit
- +6
- FC 2DR
- FC
Damage: 13 · Special mid
- Startup
- 11f
- On block
- -4
- On hit
- +5
- FC 3DR
- FC
Damage: 14 · Low
- Startup
- 16f
- On block
- -17
- On hit
- -3
- FC 4DR
- FC
Damage: 10 · Low
- Startup
- 12f
- On block
- -15
- On hit
- -4
- Dark PurificationDR
- (Astral projection)
Damage: 25 · Unblockable mid
- Startup
- 39f
- On block
- !
- On hit
- +40g
Alternate input with AP.db+1+2
- Dragon UppercutDR
- (Charged stance)
Damage: 54 · Mid
- Startup
- 19~21f
- On block
- -15
- On hit
- KND
- Rising UppercutDR
- (Charged stance)
Damage: 42 · Mid
- Startup
- 11~12f
- On block
- -9
- On hit
- +37a / (+27)
- Enma's FuryDR
- (Charged stance)
Damage: 72 · Unblockable mid
- On block
- !
- On hit
- KND
- Enma's InfernoDR
- (Charged stance)~~~~
Damage: 72,60... · Unblockable mid / Unblockable mid / Unblockable mid / Unblockable mid / Unblockable mid / Unblockable mid / Unblockable mid / Unblockable mid / Unblockable mid / Unblockable mid
- On block
- !
- On hit
- KND
Shoots 9 close range fireballs, with the final one being similar to normal 1+2. Number of fireballs isn't controllable, always shoots 10
- Down StrikeDR
- (grounded opponent)+
Damage: 18 · Low
- Startup
- 18f
- On block
- -12c
- On hit
- -1
- Geta StompDR
- (grounded opponent)+
Damage: 24 · Low
- Startup
- 17~18f
- On block
- -16c
- On hit
- -6
Jinpachi is playable in Dark Resurrection on PlayStation 3; he is a boss opponent in vanilla Tekken 5 and the arcade/PSP versions of DR.
← Choose another fighter